Cloud-to-Mesh Distance
Menu / Icon
This tool is accessible via the ![]() icon in the main upper toolbar or the 'Tools > Distances > Cloud/Mesh dist.' menu.
icon in the main upper toolbar or the 'Tools > Distances > Cloud/Mesh dist.' menu.
Description
This tool computes the distances between a cloud and a mesh.
Procedure
To launch this tool you'll have to select either one cloud and one mesh, or two meshes.
Choosing the mesh roles
If you have selected one cloud and one mesh, the mesh will automatically be used as reference.
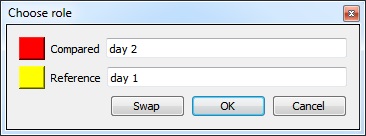
If you have selected two meshes, CloudCompare will ask you to define the roles of each mesh:
- Compared mesh: CloudCompare will in fact only consider its vertices and compute the distances for each of them relatively to the reference mesh. The generated scalar field will be hosted by this mesh (well, its vertices in fact).
- the Reference mesh will be used as reference, i.e. the distances will be computed relatively to its polygons. If possible, this mesh should have the widest extents.
Warning: if you want to compare two meshes, and the compared mesh vertices are too sparse, you should consider using the ' Sample points on mesh' tool first in order to sample (a lot of) points on the compared mesh and then use the resulting cloud as the compared entity.
Approximate distances
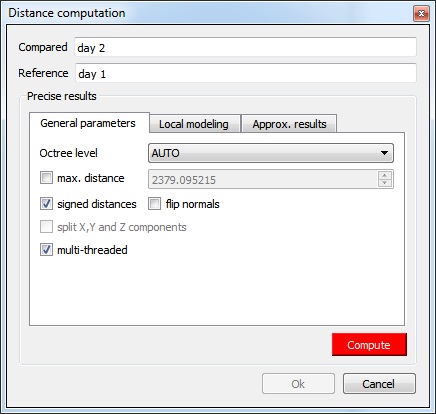
When the Cloud/Cloud distance computation dialog appears, CloudCompare will first compute approximate distances (which are used internally to automatically set the best octree level at which to perform the real distances computation - see below). The reference cloud is hidden and the compared cloud is colored with those approximate distances.
Some statistics on those approximate distances are displayed in the 'Approx. results' tab (but they shouldn't be considered as proper measurement values!). Those statistics are only provided for advanced users who would like to set the octree level at which computation is performed themselves (however this is generally not necessary).
The user must compute the real distances (see the red 'Compute' button) or cancel the process.
Parameters
The main parameters for the computation are:
- Octree level: this is the level of subdivision of the octrees at which the distance computation will be performed. By default it is set automatically by CloudCompare and should be left as is. Changing this parameter only changes the computation time. The main idea is that the higher the subdivision level is, the smaller the octree cells are. Therefore the less points will lie in each cell and the less computations will have to be done to find the nearest one(s). But conversely, the smaller the cells are and the more cells may have to be searched (iteratively) and this can become very slow if the points are far apart (i.e. the compared point is far from its nearest reference point). So big clouds will require high octree levels, but if the points of the compared cloud are rather far from the reference cloud then a lower octree level is better...
- Max dist.: if the maximum distance between the two entities is high, the computation time might be awfully long (as the farther the points are, the more time it will take to determine their nearest neighbors). Therefore it can be a good idea to limit the search below a reasonable value to shorten the computation time. All points farther than this distance won't have their true distance computed - the threshold value will be used instead.
- signed distances: whether computed distances should be signed with the triangle normal or not
- flip normals: if signed distances is checked, then CloudCompare can automatically invert the sign (may be necessary if the order of the triangle's vertices is inverted)
- multi-threaded: whether to use all CPU cores available (warning: the computer might not be totally responsive during the computation)
- split X,Y and Z components: not available for cloud-to-mesh distance.
Displaying the resulting distances color scale
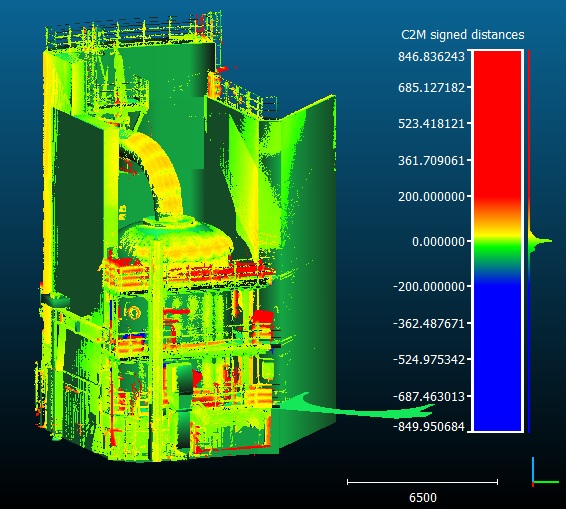
Once the computation is done, the user can close the dialog. To display the resulting scalar field's color scale, just select the compared entity and then check the 'Visible' checkbox of the 'Color Scale' section of its properties.
Alternatively use the shortcut 'Shift + C' once the entity is selected to toggle the color scale visibility.
One can also set the color scale to be used with the 'Current' combo-box (and edit it or create a new one with the 'gear' icon on the right).


