Align
Menu / Icon
This tool is accessible via the ![]() icon in the main upper toolbar or the 'Tools > Registration > Align (point pairs picking)' menu.
icon in the main upper toolbar or the 'Tools > Registration > Align (point pairs picking)' menu.
Description
This tool lets the user align two entities by picking at least three equivalent point pairs in both entities.
This method is very useful to align clouds quite precisely. It's even sometimes the only way to get a fine result (typically if the two clouds have great differences on large extents, in which case the ICP registration won't work properly).
Note: since version 2.6 you can use this tool directly on meshes - this way you can register two clouds, a cloud ad a mesh or two meshes.
Procedure
First, select two entities then call this tool.
Role assignment
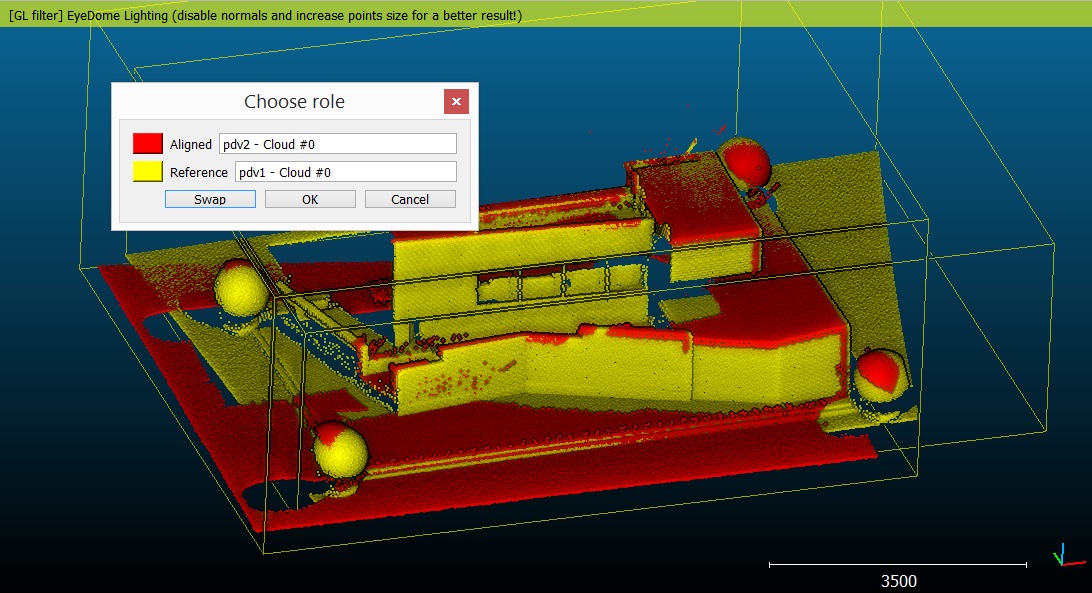
Then you'll have to designate (with the classical 'role' assignment dialog) which cloud will be the Reference (won't move) and which one will be the aligned cloud (the one actually moving at the end):
Picking point pairs (or spheres)
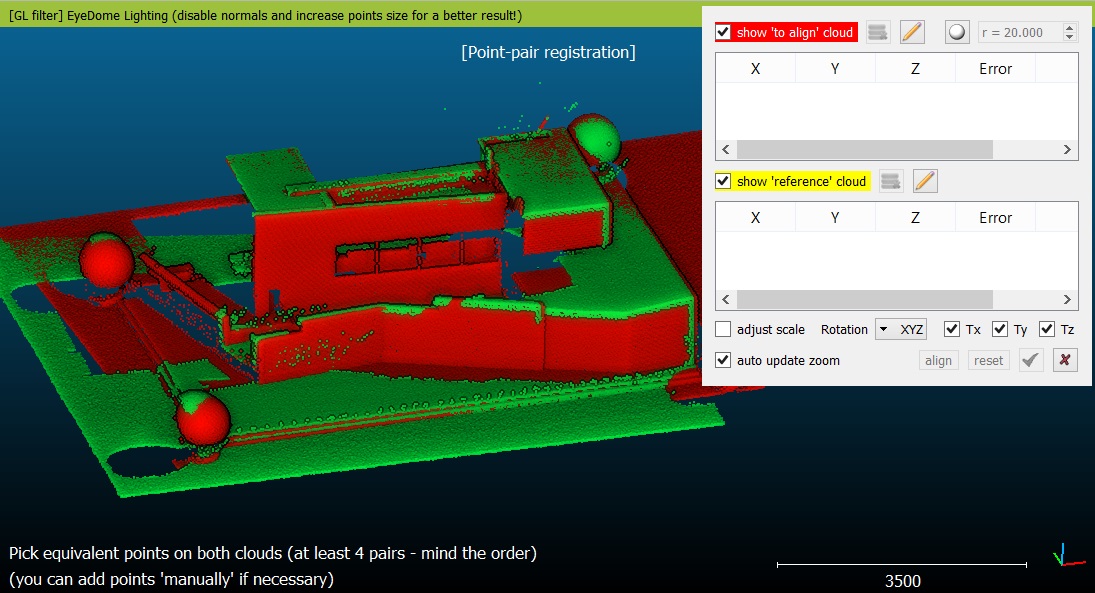
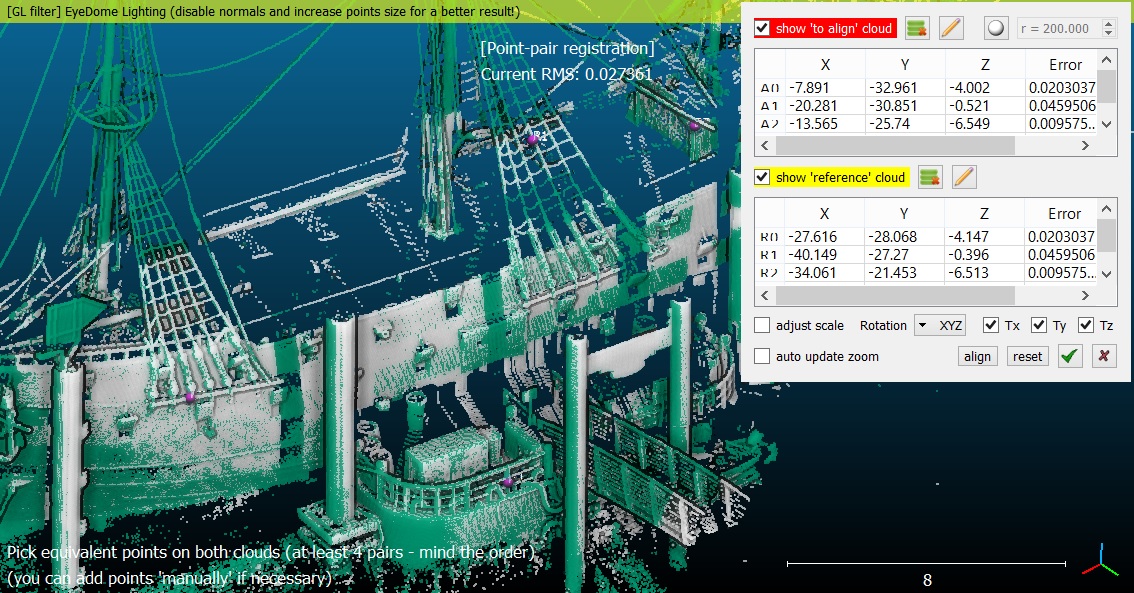
Once this is done, the two selected entities will be displayed in a dedicated 3D view, and a new dialog will appear in the upper-right corner.
You are invited to select on both clouds the same set of remarkable points (mind the order). You can:
- input (virtual) points with the 'pencil' icon (e.g. ground control points)
- pick points directly on the clouds (3D view)
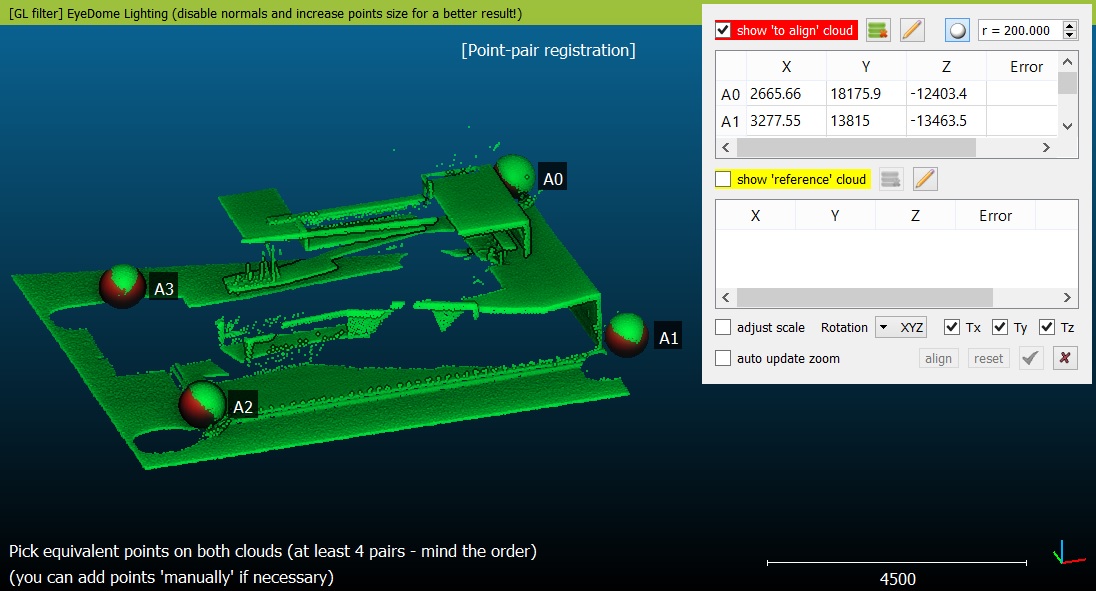
- since version 2.6.1, you can optionally check the 'white sphere' icon (top-right corner) and set a search radius (roughly the radius of the registration spheres in your scans if you know it). Once activated, CC will try to detect a sphere in the cloud around each point you pick. If successful, it will use the sphere center as registration point. Note that the input radius is only indicative (it will be used to search points around the one you pick). CC will then automatically detect the best fit sphere radius (it is displayed in the Console, along with the best fit RMS). Spheres and simple 3D points can be mixed without any problem.
- since version 2.6.3, you can set the maximum RMS for the sphere detection process (as a percentage of the sphere radius)
During this process, you can hide either the 'reference' or the 'aligned' cloud with the dedicated checkboxes. You can also freely rotate/translate the view point, enlarge points, zoom in or out, enable or disable OpenGL shaders, etc.
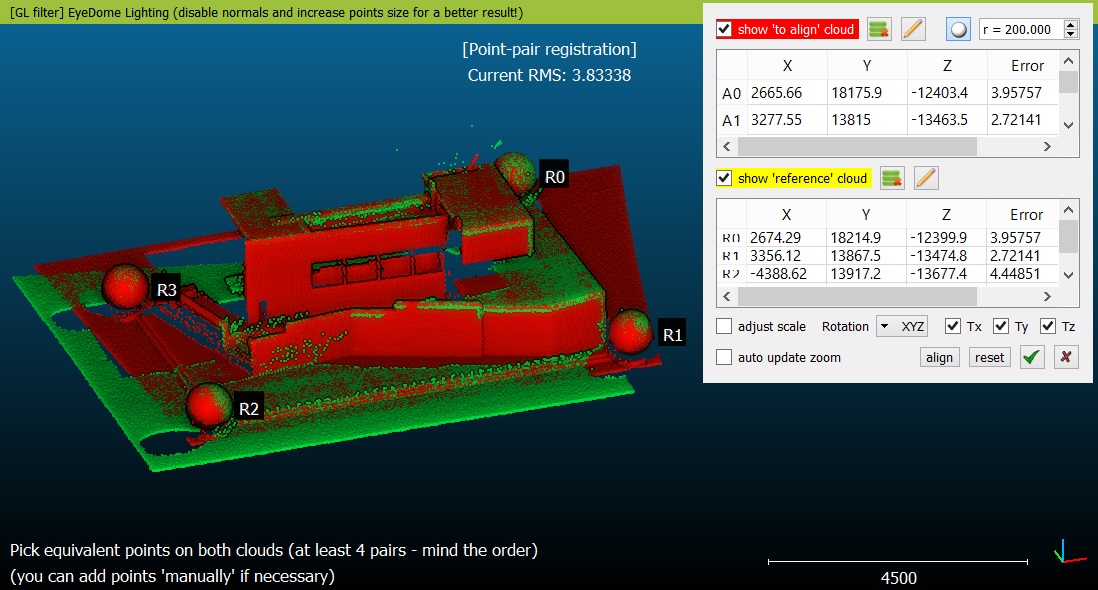
Each time you pick (or manually input) a point, a new entry appears in the corresponding table (either Aligned or Reference), as well as a marker in the 3D view (aligned markers begin with 'A', and reference markers begin with ... 'R').
Alignment
As soon as you have selected at least 3 or more pairs (you must have picked exactly the same number of points in each cloud) CC will display the resulting RMS and you can preview the result with the 'align' button. You'll also see the error contribution for each pair next to each point in the table (so as to remove and pick again the worst pairs for instance). You can add new points to both sets anytime (even after pressing the 'align' button) in order to add more constraints and get a more reliable result. And as suggested before, you can also remove points with the dedicated icons above each tables or with the 'X' icon next to each point.
Validate / Cancel
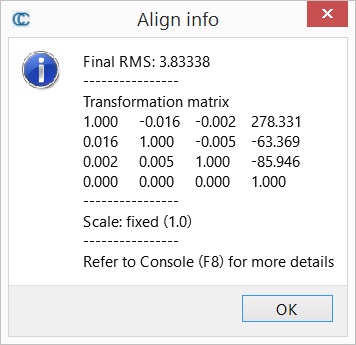
You can validate or cancel the current registration process with the green 'V' and red 'X' icons. On validation, CC will display a report (the same set of information is displayed in the Console (with increased digit accuracy).
Reset
You can reset the current 'Aligned' cloud pose anytime with the 'reset' button.
Advanced parameters
This tool can also determine the best scale factor between the two point sets. To allow the optimization of the scale parameter, simply uncheck the fixed scale checkbox.
This can be very useful if the two clouds have different scales and you don't know the scale factor between them (otherwise you could use either the 'Edit > Multiply/Scale' tool).
Warning: if the scale is not fixed (i.e. different from 1) then the 4x4 transformation matrix issued on completion of this tool will be affine. Typically, the Edit > Apply transformation tool will fail to invert it...
